 Mindset has been on my mind all week. On Monday our principal showed us the video below, base on years of research by Stanford University psychologist Carol Dweck, about how powerful mindset is in influencing achievement. This is life changing stuff. Basically, there are two mindsets - fixed and growth. A fix mindset is based on the belief that our skills and abilities are set and don't really grow or change. It's the mentality that statements like "I'm just not good at math" or "she's a natural athlete" come from. It's also pervasive in how we as a society view artists. The myth is that artists are born, not made through hard work and effort. Children bring this mindset to our classes everyday - it's present the ones that are afraid to try because they worry their work won't measure up and it's present in the ones who have more advanced skills but don't move forward. What we want, of course, is all our kids to work hard and grow - to have a growth mindset. A growth mindset is the idea that traits like ability and intelligence can always be improved through practice. These are the students who's ability increases during your class by leaps and bounds. It's also the mindset of great artists, like Michelangelo, who said "If people knew how hard I worked to get my mastery, it wouldn't seem so wonderful at all." So, how do you create a growth mindset in your students? It's all in the praise you use. Comment on effort, not ability. Instead of just "Wow, that looks great!" add "I can tell you spend a lot of time planning your composition". It sounds simple but putting it into practice takes time. I have to constantly remind myself to comment on the effort, not just the result. The great thing about praising effort is that it's very meaningful for students with all skill levels and it encourages all students to keep working. Some growth mindset supporting praise stems that can change your classroom culture: I can see you really focused on__________. I can tell you put time in to developing______________. You work shows me that you understand how _____________ works. I can see so much growth between ___________ and ____________. Great job! I noticed that ________ wasn't successful the first time but I saw you work through it. Excellent effort. Your hard work really paid off in how ___________ turned out. Here's to having a growth filled school year!
0 Comments
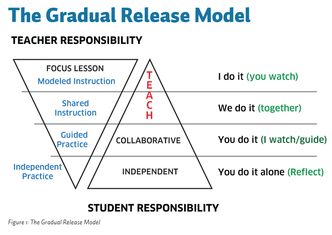
My educational catch phrase this year is "I do, you do, we do". It's an instructional method, also known as the Gradual Release Model, that scaffolds responsibility and ownership from teacher to students in phases. I love it because it gives kids the skills and knowledge they need to be successful applying their own ideas - and using their own ideas to make original art is where we want kids of all skill levels to be.
Next comes the fun part; a summative assessment in the form of an open-ended project where students are asked to apply what they've learned during the unit. Students will be responsible for planning, selecting materials and applying concepts. This section will be supported by our Art of Apex Portal which is filled with resources to support independent learning.
See why I'm excited?! The last day of summer vacation is finally here. My mindset is shifting from pools and parks to inside the classroom. I'm excited for what this year has in store. All summer Ian Sands, Kim Sudkamp and I have been planning exciting, challenging units of study centered around the concept of what artists do. Hint - it's not follow each step just like the teacher does it. Instead, we'll teach concepts, processes and techniques grouped around specific artistic behaviors for guided practice then ask students to apply what they've learned in open-ended projects. Neat, right?!
The big thing I'm thinking about today: Differentiation. It's always important but for Art 1 classes it's the make-or-break issue. When presented with a conceptual, open-ended project some kids panic because it's outside of their comfort zone. Maybe they don't have the technical skills they feel they need or developing an idea presents an obstacle. On the other hand you have students who are filled with ideas and ready to jump in. To accommodate both, and those in the middle, it works best to provide a range of examples and options. I always include something concrete and something based on more abstract ideas. I try to present at least one option that doesn't rely on skill with traditional media to be successful. Creating multiple pathways to mastery of learning goals helps everyone. Art 1 is a huge opportunity to make life long supporters of the arts. The last thing I want is for students to leave at the end of the course without making art that they're proud of. Now to add this in my plans........... :) Today I had the privilege of visiting Discovery Child Development Center in Morrisviille NC and talking to the staff about how to structure open-ended art lessons. The three tips I gave them will work with any age level and are perfect to try if you're TAB-curious but not ready to set up your centers yet. What an awesome place! The staff was great and I loved the STEAM approach they use with the kids.
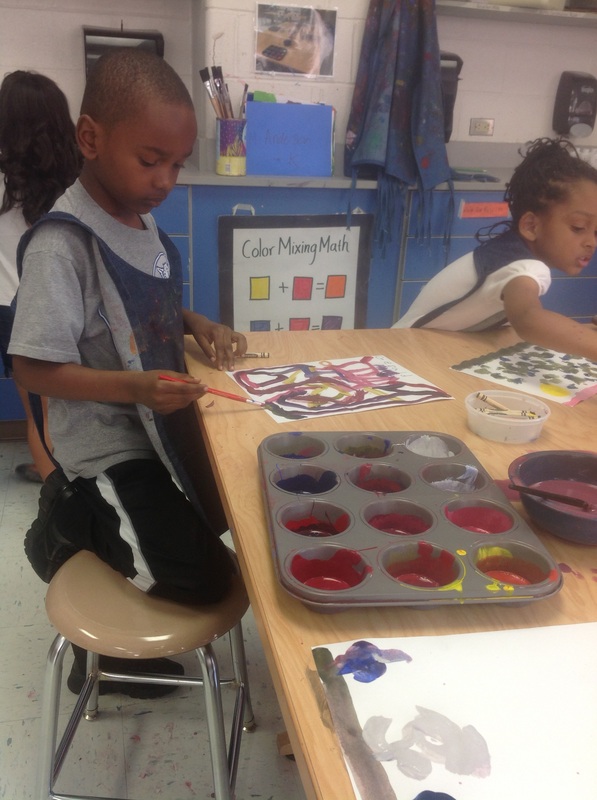
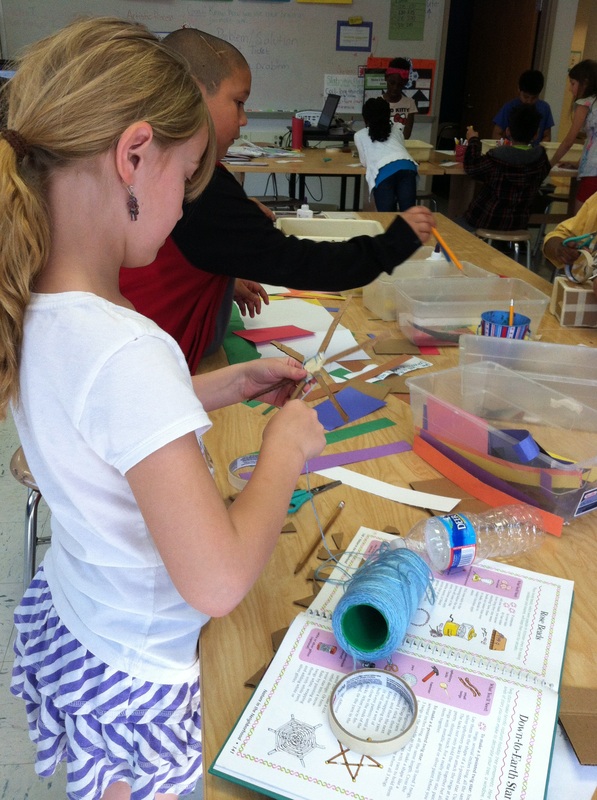
Three ways to open your art lessons: 1. Start with the medium or process - not the product. Instead of making a predetermined product, like paper flowers with scissors and glue or a Van Gogh inspired sunset, plan a lesson around how collage works or ways to create texture with paint. Introduce it, demonstrate it, provide a variety of materials and let the kids explore. 2. Start with a question and approach it like a scientist. Set up the lesson with a demonstration followed by guided practice and then let students learn through trial and error. Some example questions: How many ways can you mix brown? What can you make out of a cereal box? What are some ways to incorporate balance in your artwork? How can you communicate the idea of identity in your work? Or have kids pose their own questions! 3. Facilitate problem solving with good questions. Students will run into problems. When they do, take advantage of these excellent learning opportunities by having the right questions ready. Examples: Why isn't it working? What would happen if you changed (specific part or aspect)? What is one thing that could make you like it better? Where could you find that information? What do you like best about what you have done so far? Did you learn anything new?  I've been looking at picture after picture of art teacher rooms today. They are decked out to the nines with thematic, coordinating decor. I felt a temporary urge to run to school with my staple gun looking at them. I suppressed it. You see, I think we as art teachers place too much importance on appearance. Now I've lost you. What art teacher wouldn't place the up-most importance on how things look, you ask? Well, one who places more importance on the thought behind them.
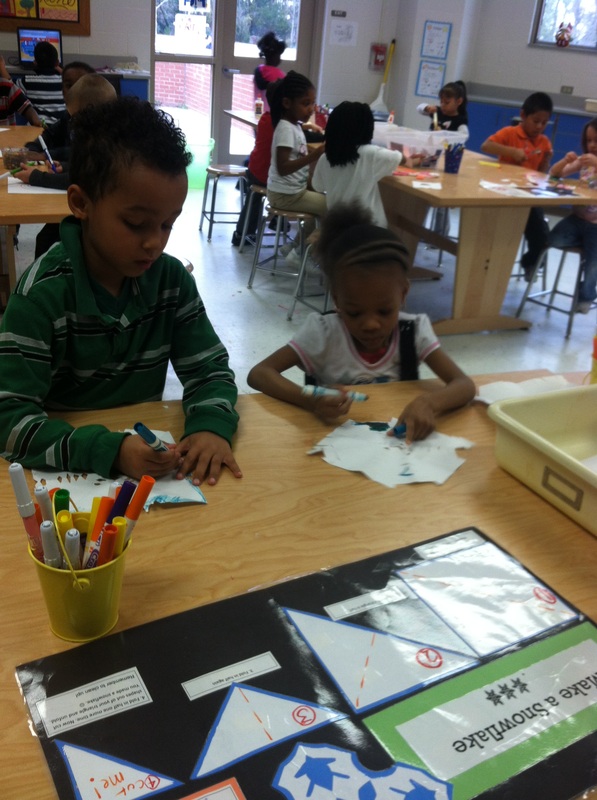
Take, for example, the student artwork in the hallway. It's beautiful, brightly colored and coordinated. We've all seen it countless times. It has the same appeal as a rack of shirts at the Gap - looks great on display but no one would mistake each one as an original. Art is there, in the set up of the lesson, in the organization of the steps, in the displaying of the work but not in the work itself. The tasks that students are asked to do in this scenario are to reproduce each step as directed. It's what the parents expect, it's what the teachers expect, it's even what the students expect but it is not art. Art does not match, it is not same size and color palette as the art it's displayed next to. It's not orchestrated by the teacher. Student art should be planned by the student. It should be varied, original and sometimes messy. Student artwork isn't always pretty. There are false starts, mistakes and projects that get entirely scraped. That's okay. Mistakes often provide the best opportunities for growth, as does failure. When the teacher takes on the planning, the selection of materials and the problem solving of a lesson the work that results is the teachers, not the student's. A common misunderstanding of TAB is that it's a free for all. It's not. I mentioned in previous posts that I started my elementary TAB program in a school where I was observed daily. The expectation was that my teaching was based on state standards and that I was never more than one day off the county pacing guide. It was also expected that I clearly show student growth and mastery of standards. Here a some things I did that worked for me: - I started my planning by going through the standards at each grade level and dividing them into two groups. One group consisted of standards that would be met by everyday center work. So, using the North Carolina Essential Standards for grade 5, things like "create art that reflects personal voice and choice", "apply the Principles of Design in creating compositions","evaluate solutions to artistic problems, including their effectiveness" and "evaluate how to manipulate tools safely and appropriately to reach desired outcomes" could all be taught and assessed through student work in centers. To facilitate this I created an extensive list of questions to use for assessment. To assess manipulating tools I might ask "Tell me about what tool you used to make this. How did you use it to make your art? Why did you pick it?" These questions were listed with the standards in a sort of "base" lesson plan for each grade for standard center work. I also compiled a collection of evaluation rubrics with learning goals written in student friendly terms, like this one for manipulating tools: 5.V.3.1: Evaluate how to manipulate tools safely and appropriately to reach desired outcomes.
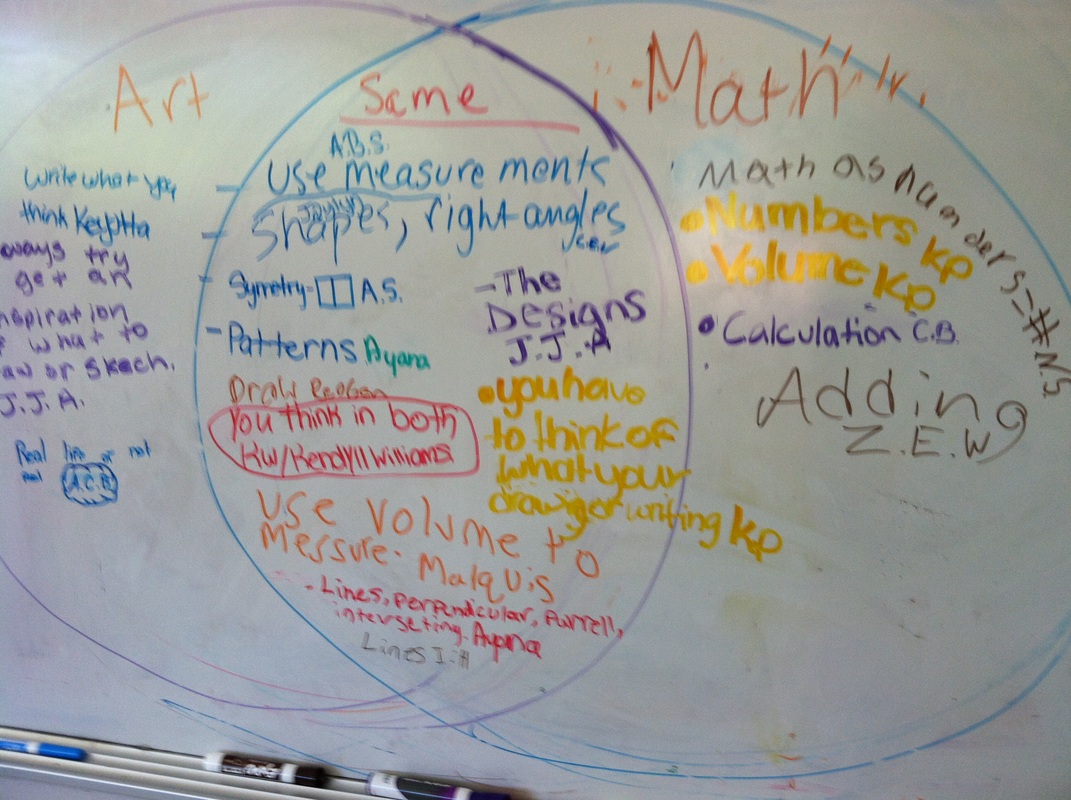
- The second group of standards were those that were not taught as a normal part of centers. For these I used mini lessons in the start of class to teach the standards and assessed them during work time, weaving assessment in to student's own work. I organized these mini lessons into units of study, centered around a central theme. For example, in a unit centered around the idea of how art connects with other subjects I might teach a mini lesson one week about how patterns are important in both math and art. During work time I might ask students to compare and contrast math and art using a visual organizer to record and share their personal connections. - Self-assessment was something that worked well for student's learning, especially with process. Command charts, lists of steps or videos of processes were all incorporated as tools for students to use as tools to check learning or revisit needed information.
|
Mrs. PurteeI'm interested in creating a student student centered space for my high school students through choice and abundant opportunity for self expression. I'm also a writer for SchoolArts co-author of The Open Art Room. Archives
December 2019
Categories
All
|
 RSS Feed
